- A failed or incorrectly configured BIOS update can prevent the PC from booting, but in many cases it is recoverable without changing the motherboard.
- Clearing CMOS, checking the boot order, and reflashing the BIOS from a USB drive are the basic steps to recover the firmware.
- Windows repair tools (Startup Repair, DISM, SFC and bootrec commands) allow you to restore the boot process when the system becomes corrupted.
- If no method works, it may be irreversible damage to the board, at which point it is advisable to use the warranty or consider a replacement.
When we update the BIOS, we usually do it to gain compatibility, stability and new features On the motherboard: better processor support, faster RAM, bug fixes… The problem is that, from time to time, it backfires and we find that the PC won't boot after BIOS updateA black screen appears, or a restart loop, which looks very bad.
The first thing you should know is that this scenario, however dramatic it may seem, It's quite common and often has a solution. without needing to change your motherboard or buy a new PC. In this article, we'll review, calmly and in detail, all causes and methods of recovery that are used today: from a simple Clear CMOS to advanced recovery systems from manufacturers such as ASUS, Gigabyte or MSI, including Windows boot repair, MBR/BCD reconstruction or the use of rescue media.
Why won't my PC boot after updating the BIOS?
When the computer stops booting right after flashing the BIOS, the symptom is usually always the same: black screen, no Windows loading, and sometimes a loop of power cyclesOn brand-name laptops or desktops (Dell, MSI, ASUS, etc.) this may be accompanied by lit LEDs, spinning fans, and even an illuminated GPU, but no signal on the monitor or any active keyboard or mouse.
The explanation usually lies in the fact that The main BIOS has not been updated correctly or the process was interrupted midway (power outage, crash, wrong file, etc.). It's also possible that the new firmware is incompatible with your motherboard or with some componentor that it has altered certain critical boot parameters that prevent Windows from starting normally.
Among the most common causes of a PC not booting after a BIOS update are: these typical scenarios:
- Update interrupted or failed (shutdown, restart or freeze during flashing).
- Incorrect BIOS settings after the update (disk mode, boot order, Secure Boot…).
- Wrong or unsupported BIOS version for your exact motherboard model.
- Corrupted operating system (Windows becomes corrupted during the process or on the first boot).
- Physical problems with the motherboard or irreversible corruption of the BIOS chip.
In severe cases, when the BIOS is completely damaged, your PC may be left in what is known as "brick"There's no way to get it to boot, not even to the setup screen, and the repair may require specialized equipment or motherboard replacementThat's why it's so important to act methodically and not improvise haphazardly.
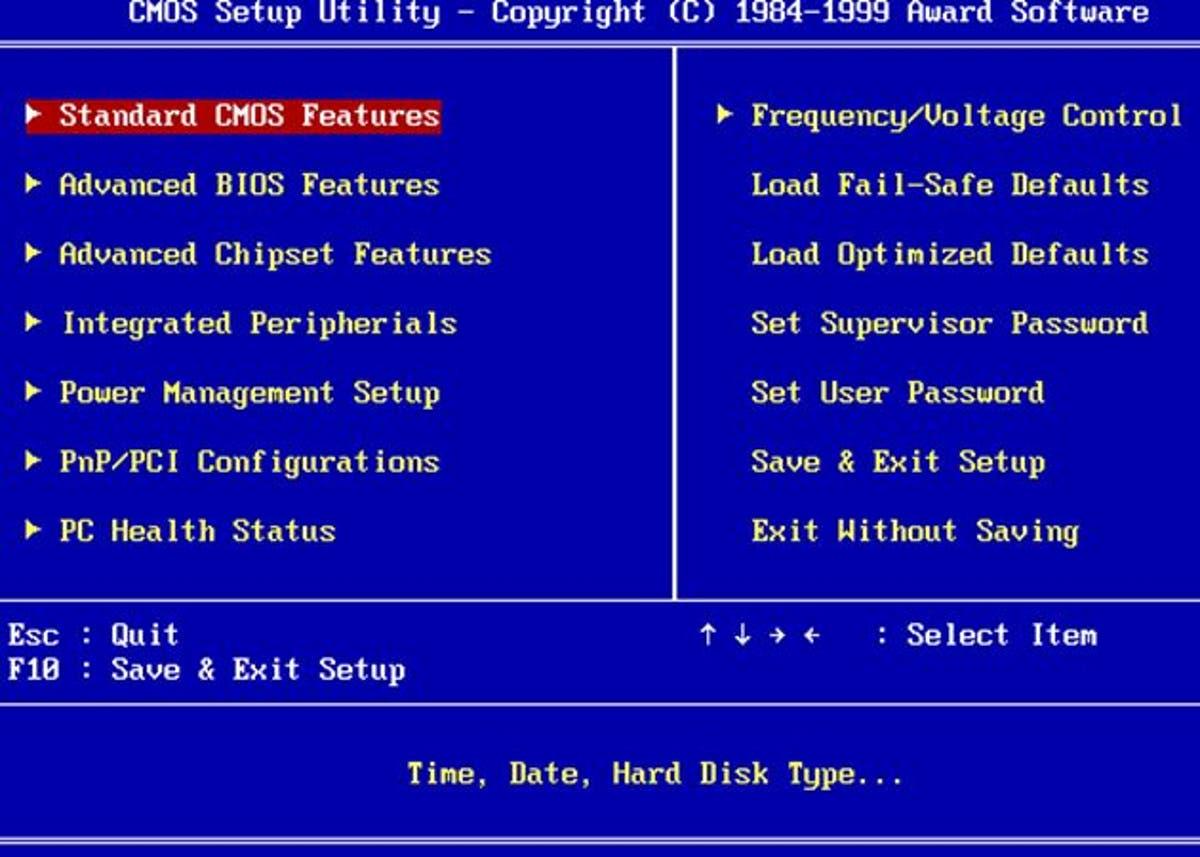
Common symptoms after a failed BIOS update
Before we start testing solutions, it's important to properly identify What type of starting failure are you experiencing?Depending on what happens on screen (or what doesn't happen), the focus changes considerably:
On many desktop computers, after updating the BIOS, the typical behavior when something goes wrong is that The fans turn on and off in a loop.Sometimes error codes appear on the motherboard display (if your model has one). In other cases, the PC seems to power on normally but There is no video signal and the USB keyboard/mouse is not receiving power.
It is also common for the computer gets stuck on the BIOS manufacturer screen (for example, American Megatrends) forcing you to press F1 to enter the settings. It's even possible that, after updating, your computer repeatedly enter the Windows recovery screen (the famous blue screen with options to continue, troubleshoot, or shut down), without ever reaching the desktop.
Some laptops go a step further and, after a BIOS update from the official utility (for example, MyAsus), They don't even turn onNo LEDs, no fans, no beeps… as if they were completely dead. In many cases, especially if the laptop is new, this is covered under warranty, but it's always good to know. What can you check before sending it to the repair shop?.
First steps: Check if the motherboard and Windows are still working
The key to knowing if your computer is repairable at home is determining if the motherboard is still functioning in any way. If you can Enter the BIOS, view the manufacturer's logo, or boot from USBThe chances of saving the system are quite high. If there is absolutely no reaction, things get complicated.
If the PC turns on but Windows doesn't boot, a very useful test is to try booting from a rescue meanssuch as Hiren's BootCD PE, a USB drive with Windows PE, a Linux distribution in Live mode, or even the Windows installer. If you manage to boot from there, it means that The BIOS is functional, and the problem is probably in the operating system or the boot configuration.not on the plate itself.
From environments like Hiren's BootCD you can run tools like CrystalDiskInfo to check the disk status, run DISM and SFC commands on the Windows installation, or even recover data before tackling more aggressive repairs.
On the other hand, if the motherboard has dual BIOS systems or automatic recovery (such as Gigabyte's DualBIOS or ASUS' CrashFree BIOS 3), it's important to know how to recognize if they are trying to act: sometimes you'll see specific LED sequences, "recovering BIOS" messages on the screen, or different behavior than usual when turning on the computer.
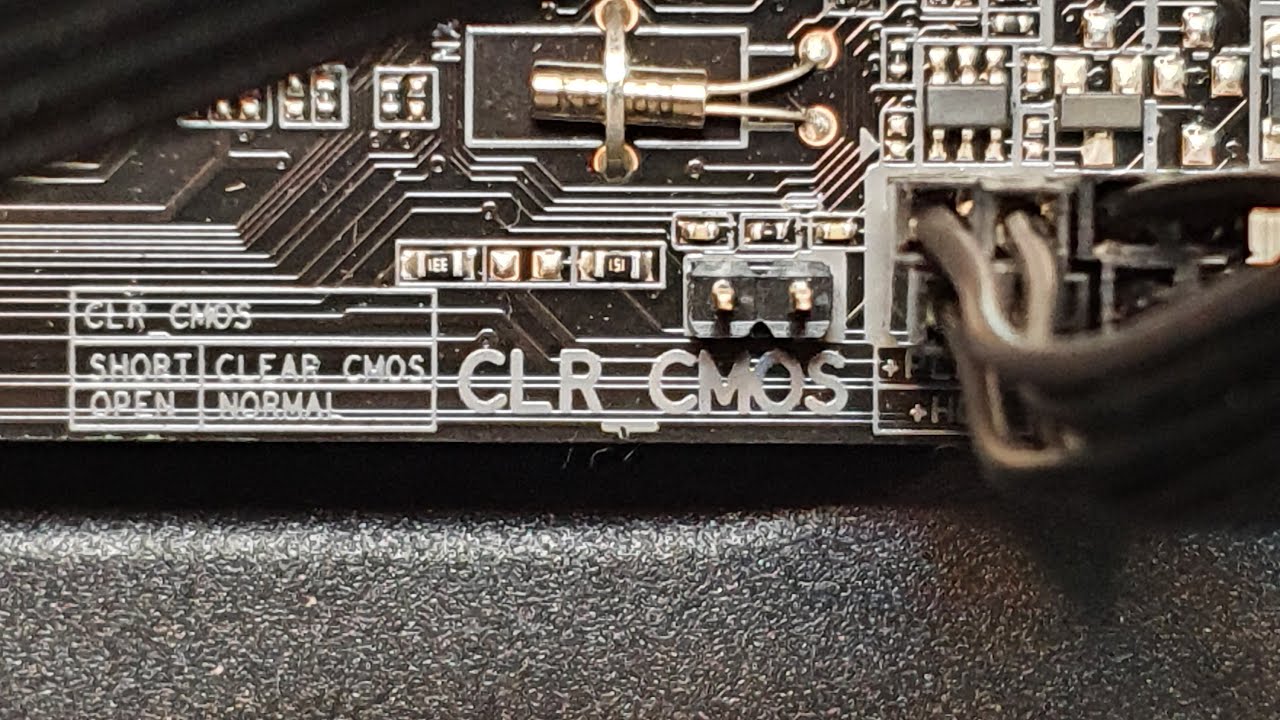
Clear CMOS: The quick reset that solves many problems
The simplest step, and one that should almost be mandatory when there are problems after an update, is to do a Clear CMOSThe CMOS is the small memory, powered by a coin cell battery, where the motherboard stores all BIOS settings (time, boot order, overclocking profiles, voltages…); if something in that configuration clashes with the new firmware, the system may refuse to boot.
By clearing the CMOS, we force the board to return to factory settingswhich tend to be the safest and most conservative. The process may vary depending on the model, but essentially it is based on cut power to the plate for a while:
- Turn off your PC completely and disconnect the power cord from the source.
- Press and hold the power button for a few seconds. 30-60 seconds to download possible energy remnants.
- Open the box and locate the CMOS battery (usually a 3V CR2032)Remove it carefully.
- Wait a few minutes, replace the battery, and reconnect the power cable.
- Turn on the device and check if it now It reaches the post and shows a video..
On many modern motherboards you can also perform a Clear CMOS using a specific jumper or a dedicated button on the rear panel. In those cases, simply follow the instructions in the manual: usually, with the PC turned off and unplugged, you place the jumper in the erase position for a few seconds or press the button, and that's it. For many users, This simple maneuver has brought the team back to life after a problematic update..
Use a USB flash drive to reflash or recover the BIOS
If after clearing the CMOS the PC remains the same (black screen, boot loop or strange errors), it's time to move on to something a little more elaborate: reflash the BIOS from a USBThe idea is very simple: prepare a USB drive with the correct BIOS file and use the functions of recovery or external flash which many manufacturers now integrate into their motherboards.
Please note that this method is always performed from another computer that does workbecause the faulty equipment won't start. The first thing to do is find out the exact model of your motherboard (Gigabyte, ASUS, MSI, ASRock, etc.) and download the BIOS file you want to install from the official website: it can be the latest stable version or an older one that you know worked well for you.
Once the file is downloaded, format a USB drive en FAT32 and copy the BIOS file to the root directory. On some motherboard models, there's a trick to it: you have to Rename the file with a specific name so that the recovery system recognizes it, for example "gigabyte.bin", "update.rom" or similar, as indicated by the manufacturer or the manual.
Then you'll need to connect that USB drive to a dedicated USB port for BIOS recovery (many motherboards clearly mark this next to the connection itself) and, depending on the case, press a dedicated button (BIOS Flashback, Q-Flash Plus, etc.) or start the computer so that the motherboard begins to Read the firmware from the USB drive and flash the BIOS automatically..
During this process it is very common for a flashing LED near the button or USB port. While that light is on, You must not turn off or unplug the computerWhen the light stops blinking or stays on, it usually indicates that the reflashing process is complete. Wait a few seconds, remove the USB drive, turn the motherboard back on, and check if it boots normally.
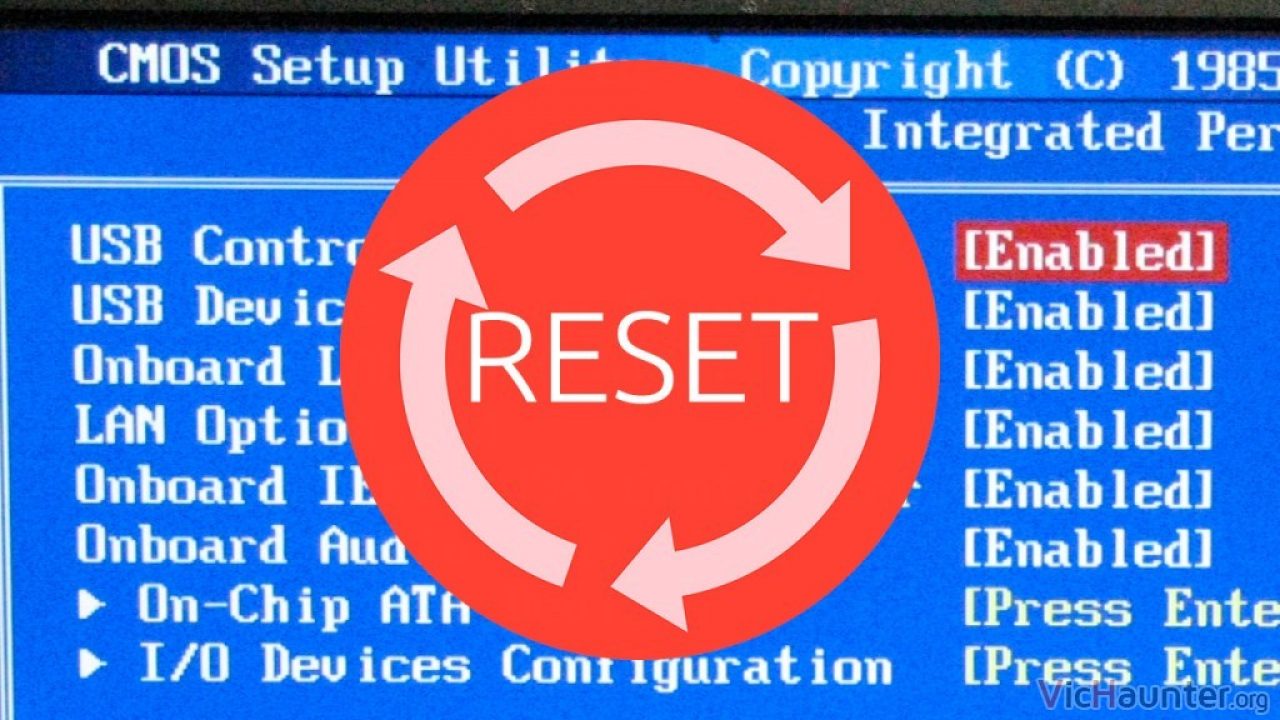
Flashback buttons and manufacturer recovery systems
Mid-range and high-end motherboards are increasingly integrating security features to protect against failed updates, which is great news when something goes wrong. Many models include a button to recover BIOS or flash it without needing the system to boot, and some even keep a secondary backup BIOS.
On modern ASUS motherboards, for example, there is the system CrashFree BIOS 3This allows you to restore the firmware using the original motherboard DVD or a USB flash drive with the correct file. The system itself enters a utility-type interface. EZ-Flash and guides you to select the file and reflash, without needing Windows to be running.
Gigabyte, for its part, offers the famous DualBIOSTwo physical BIOS chips, one primary and one backup. If the primary BIOS becomes corrupted, the backup BIOS can be affected. copy your content and restore the system automaticallyHowever, you should keep in mind that in some cases, when you update the BIOS using tools like @BIOS, Both copies are updatedIf the problem stems from the version itself and not the process, DualBIOS alone won't save you.
Other brands, such as ASRock or certain series from MSI and Gigabyte, also have own recovery mechanisms (sometimes restricted to high-end models) that work in a similar way: the system detects a damaged BIOS and enters a special restoration mode where it reads the firmware from a USB drive or optical media.
If your motherboard lacks a Flashback button or advanced systems and the update went wrong, it comes down to the classic methods: Clear CMOS, manual reflashing from USB, use of recovery jumpers or, as a last resort, resort to the warranty or a technical service that can reprogram the BIOS chip.
Some user forums recommend that if you are going to process a warranty claim for a supposedly locked motherboard, not detailing all the flashing tests you've done and simply describe the symptom (for example, "no video signal, no POST"). This is up to each individual, but it's something many enthusiasts mention to avoid arguments with the manufacturer.
Reset the BIOS to default values (and check the boot order)
Even when the update has been completed successfully, it is very common for the new BIOS version to I reset all settings to default valuesThis can cause unusual behavior, such as the PC getting stuck halfway through the POST, activating different boot modes, or Lose sight of the drive where you have Windows installed..
If you can access the BIOS/UEFI setup screen, the first sensible step is to look for the option to «Load Optimized Defaults» or «Load default values»It is usually activated with a key (F9 or similar) and then confirmed with F10 to save and exit. This ensures that no incorrect parameters have been carried over from the previous version.
Another classic issue after updating is that the system always boots to the American Megatrends screen or equivalent and forces you to Press F1 to enter the BIOSWhen you do this, everything seems normal, you save and exit… and it starts all over again. In many cases, the cause is as simple as this: the boot order has been modified and the motherboard is trying to boot from the wrong drive (an empty disk, a USB drive, an old drive).
Go to the Boot section and verify that the drive with the operating system (primary SSD or NVMe) is selected as the first boot option. After changing it, save, restart, and check if the computer boots directly into Windows. More than one user who thought their PC was "dead" has discovered that it was simply malfunctioning. prioritized boot disk.
If you suspect that the downloaded BIOS is not official or comes from a dubious source, it is always advisable to... Revert to default settings and, if possible, reflash with a stable and legitimate version from the manufacturer's official website. In some cases, a modified BIOS may contain malicious code or serious bugs that trigger all sorts of startup errors.
Repairing Windows startup after a BIOS update
Although the BIOS is the first suspect, there are many situations where the real problem lies with the operating system itself. A change in the controller mode (AHCI/RAID), a disruption to Secure Boot, or an inopportune shutdown can cause this. the Windows startup files were affected, which throws you back into the Automatic Repair Tool without success.
When this happens, the most sensible thing to do is to use Windows recovery mode and classic startup repair tools: Startup Repair, DISM, SFC, MBR/BCD Rebuild…You can reach them by starting from a Windows 10/11 installation media or from a rescue USB drive:
- Boot from the installation USB and choose your language preferences.
- Click on "Repair your equipment" instead of "Install".
- Enter Troubleshoot > Advanced Options.
- Select "Startup Repair" so that Windows can attempt to repair the boot files automatically.
If automatic repair doesn't fix the problem, you can try the System symbol within those same advanced options and run commands such as:
- bootrec /rebuildbcd
- bootrec /fixmbr
- bootrec /fixboot
These commands attempt to locate Windows installations, rebuild the boot data store (BCD) and repair the master boot record. If errors persist, you can also use bootsect /nt60 SYS o bootsect /nt60 ALL to clean problematic remnants in the MBR of the drives.
In more serious situations, where you suspect corruption within the system itself, it's worth launching a DISM /cleanup-image /restorehealth pointing to the Windows drive and then a sfc /scannow also directed to that directory. Both tools are designed to repair damaged operating system files And, combined with a rebuild of the startup, they can bring back to life facilities that seemed beyond repair.
If all else fails but you can still access the drive from a PE environment (such as Hiren's), Take this opportunity to save your important data. and consider a clean reinstallation of Windows, ideally after ensuring that the BIOS is already on a stable version and with correct parameters.
Boot into safe mode and perform minimal hardware testing
When the conflict is not so severe and the system manages to start up, even intermittently, a good idea is to force a startup in Safe ModeIn this mode, Windows only loads the drivers and basic serviceswhich helps to rule out clashes with drivers or low-level configurations that have been misplaced after the BIOS update.
To enter Safe Mode from installation media or from Windows recovery, you can follow this path: Troubleshooting > Advanced options > Startup settingsand then press F4 to start in safe mode. If the computer starts in this limited environment, it's a sign that the The system's foundation remains intact and the problem is probably in some extra component or advanced setting.
In addition to Safe Mode, it's worth testing with the minimum hardware configurationLeave only one RAM module in the recommended socket (usually A2), disconnect secondary drives, remove unnecessary expansion cards… This way you can narrow down whether the problem comes from a specific combination of components or if the motherboard doesn't work well with a module after the BIOS change.
Some users have reported problems when trying to start up with XMP memory profiles enabled After updating, if this applies to you, disable XMP and try using default memory values to rule out RAM-related instabilities.
On desktop computers with error codes on the motherboard, check which codes are displayed during startup (for example, C1, 25, 26…) and consult the manual: often the code indicates that the motherboard is stuck in the memory initialization, CPU detection, or disk configurationwhich helps to better guide the solution.
Third-party tools to repair boot issues and protect data
Beyond the native Windows utilities, there are third-party programs designed specifically for repair starting problems and manage partitions and disks when the operating system is uncooperative. Some manufacturers recommend integrated solutions within their management suites, while others rely on specialized applications.
This type of software usually allows you to create a USB boot medium Using a WinPE environment from another working PC. Once the USB drive is created, boot the problematic computer from it, select the affected system, and launch the option to "boot repair"These tools typically work with both UEFI and BCD and MBR, rebuilding damaged boot structures and adjusting parameters without you having to struggle with manual commands.
At the same time, it is very important that you do not lose sight of the issue of the backups of your dataErrors such as "computer does not boot after BIOS update" are a reminder that any firmware or system failure can cause problems. to endanger personal, professional or academic information unless you have it safely stored elsewhere.
When making backups, it's ideal to use backup software that allows you to back up the entire system, files, applications, and disks to another physical drive or to the cloud, and restore relatively quickly in case of disaster. Many of these programs offer incremental and differential backupsAutomatic scheduling (daily, weekly, monthly) and support for creating rescue media to boot from when Windows fails to do so.
With a good backup strategy, a BIOS failure or a broken boot becomes a matter of time, not a major problem. data loss tragedyAlthough it doesn't fix the firmware issue, it at least guarantees that you can format or change the motherboard without fear of losing anything important.
What to do when nothing seems to recover the BIOS
It can happen, although it is not common, that after trying Clear CMOS, reflash from USB, recovery buttons, dual BIOS systems, boot repair, and every imaginable combinationThe motherboard still refuses to boot. If you get no video, no beeps, and no way to access the BIOS, you're probably dealing with a irreversible damage to the BIOS chip or the motherboard itself.
At this point, the options involve trying Try another compatible processor (preferably one of the first ones supported by older BIOS versions) in case there was any strange microcode conflict, or resort to the guarantee If the device still has it. If the motherboard is relatively new, the manufacturer will usually cover it, especially if the update was done with official tools.
On older motherboards, some users choose to send the BIOS chip to specialized reprogramming services or simply replace the motherboard. It might sound drastic, but when certain hardware starts to have these kinds of problems, it's quite likely that other cascading failures will appear over time (aging capacitors, limited compatibility with new systems, lack of updated drivers, etc.).
There are also those who decide to take advantage of the opportunity to make the leap to a state-of-the-art equipmentwith full support for current standards and the latest graphics technologies. After all, if your motherboard is a few years old, investing in a solid foundation can save you headaches in the medium term and, incidentally, give you a significant performance boost for demanding games and applications.
Whatever your situation, the important thing is to be clear that A BIOS update failure doesn't always mean the PC is lost.With some patience, following a logical order of troubleshooting (clearing the CMOS, checking the boot order, reflashing from USB, using the manufacturer's recovery system, and repairing Windows), and having recent backups, most situations can be resolved without hardware replacements. And if, even so, you end up having to install a new motherboard or computer, at least you'll be on the safe side, knowing what went wrong and how to avoid it next time.


Editor specialized in technology and internet issues with more than ten years of experience in different digital media. I have worked as an editor and content creator for e-commerce, communication, online marketing and advertising companies. I have also written on economics, finance and other sectors websites. My work is also my passion. Now, through my articles in Tecnobits, I try to explore all the news and new opportunities that the world of technology offers us every day to improve our lives.