- WSL2 integrates real Linux distributions into Windows, with a full kernel and full system call support.
- The installation is simplified with wsl --install, which enables components, installs the kernel, and configures Ubuntu by default.
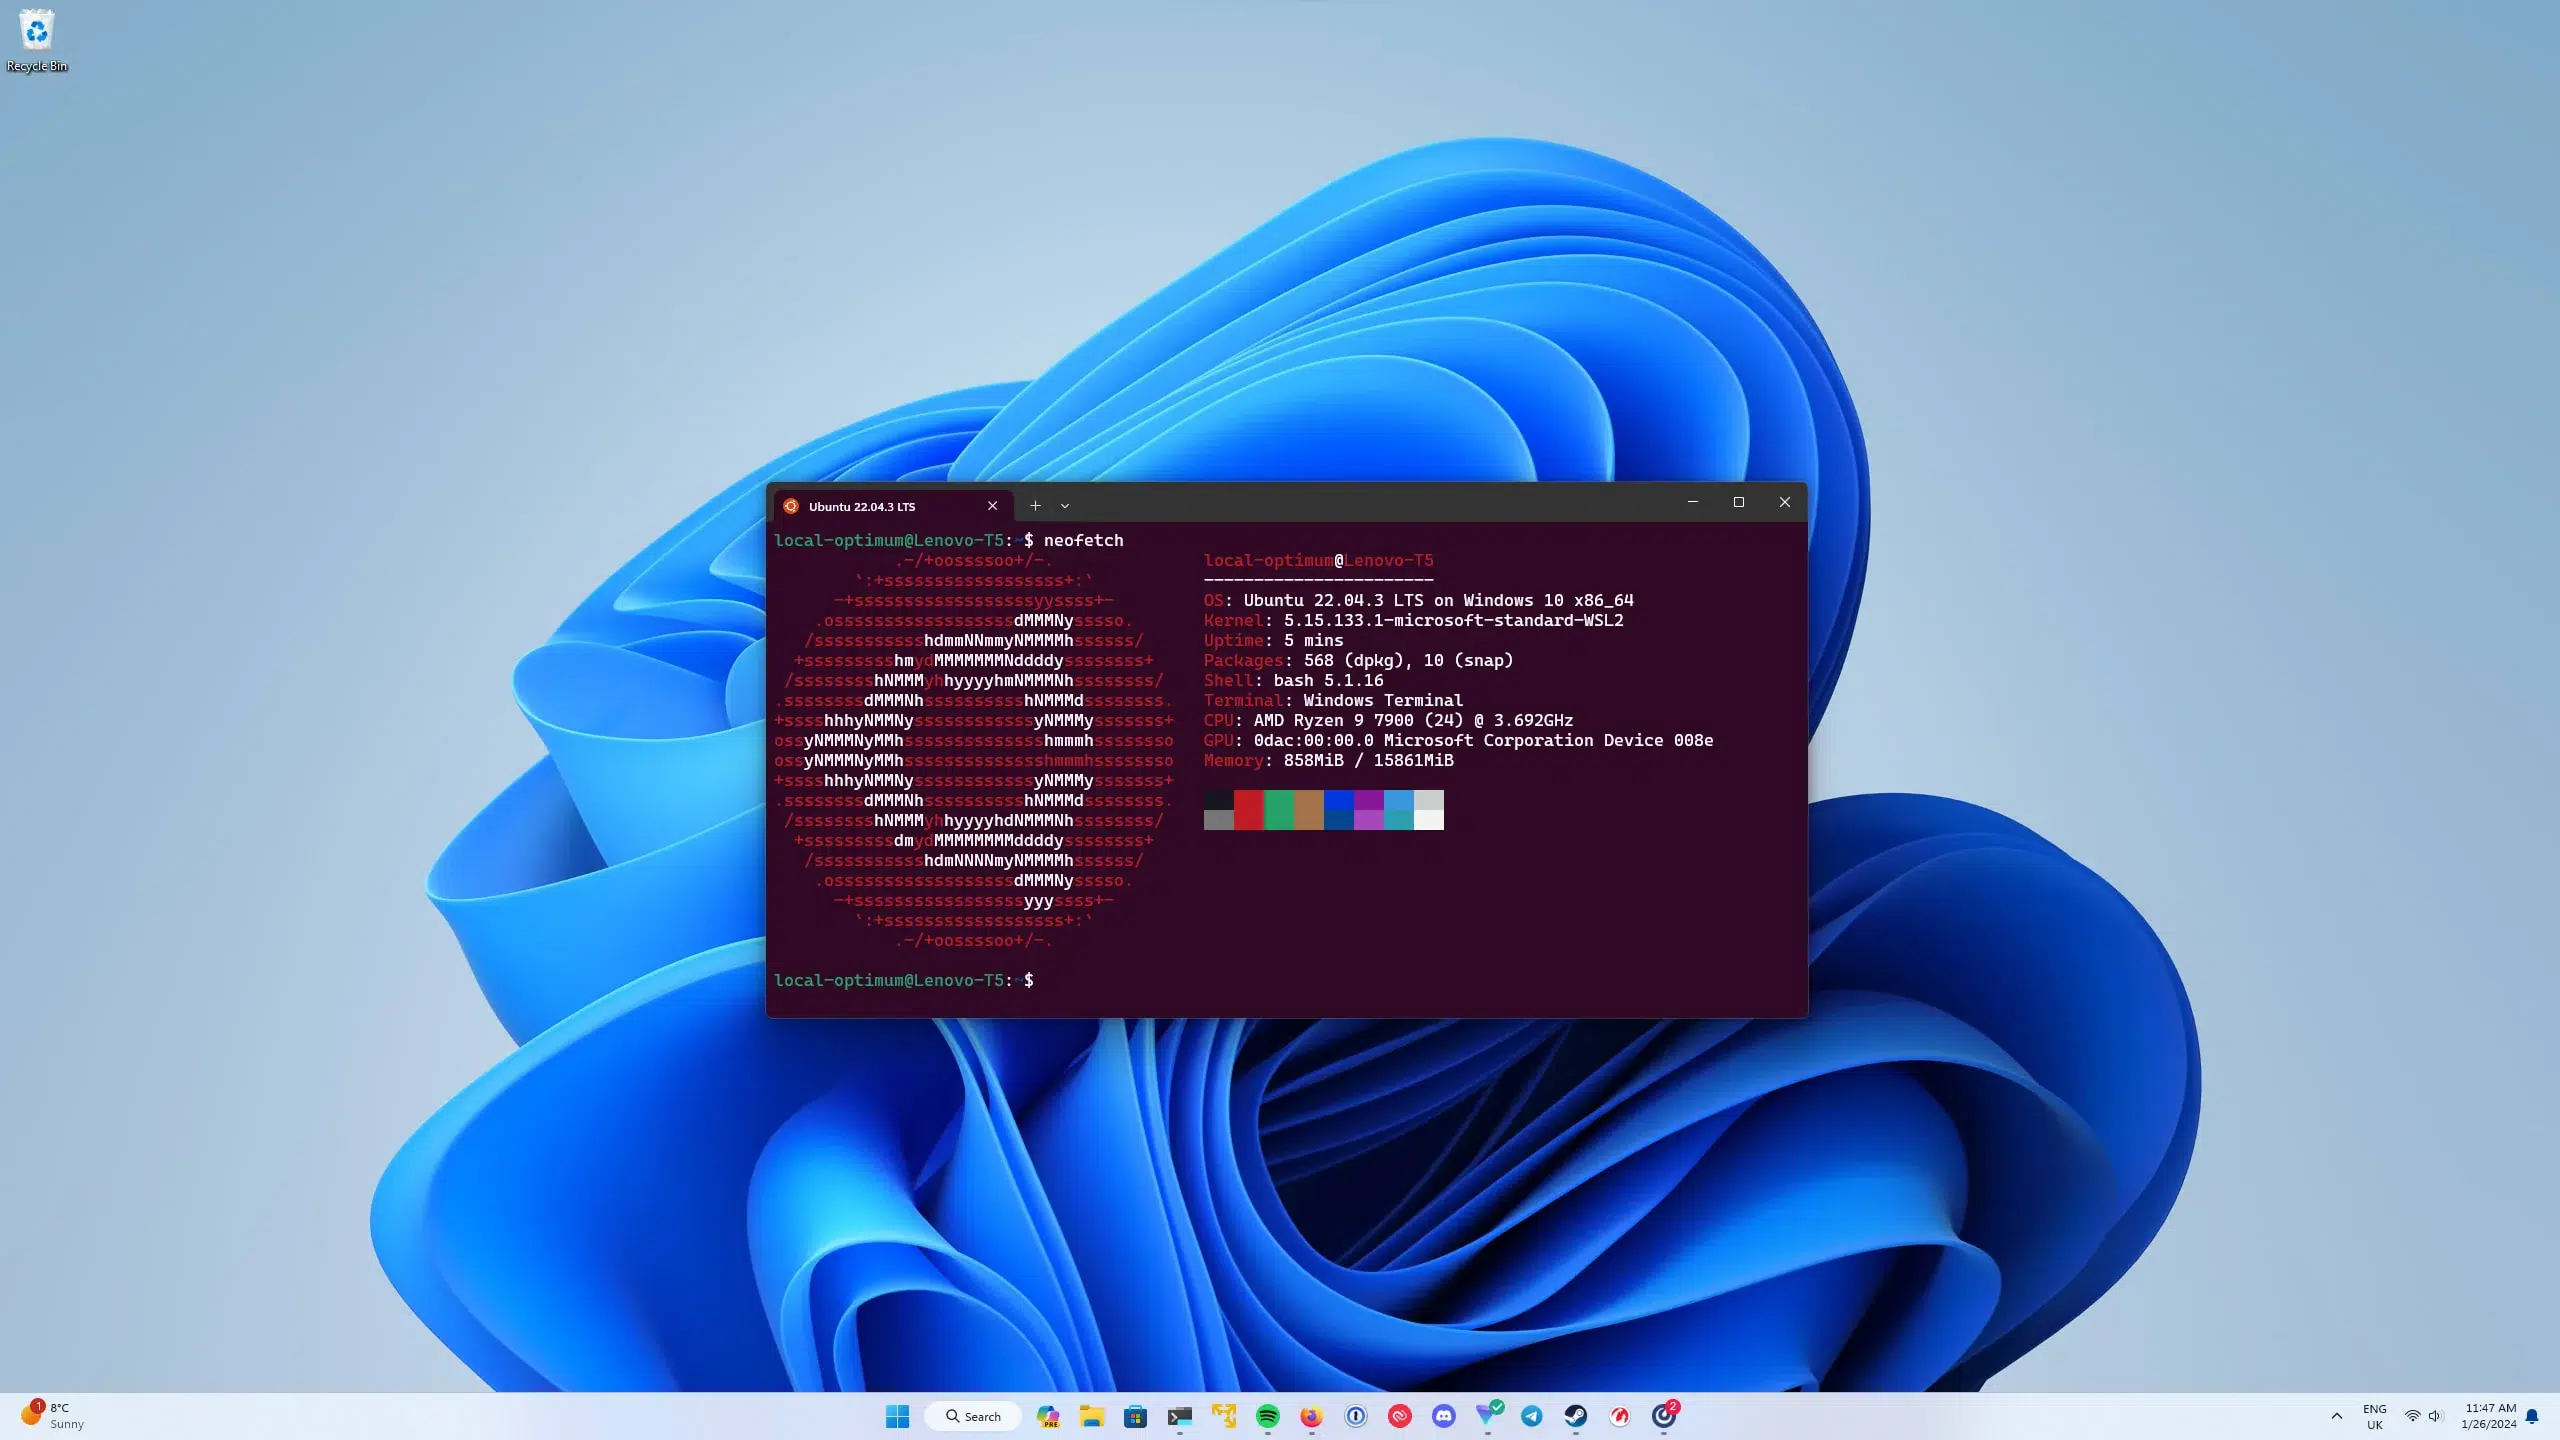
- The combination of WSL2, Windows Terminal, and VS Code allows for a development environment that is almost identical to production.
- WSL2 greatly improves the use of Docker, databases, and Linux tools, while maintaining the convenience of the Windows desktop.

If you program in Windows but deploy on Linux servers, you've probably struggled more than once with environment differences, libraries that only fail in production, or Docker running erratically. WSL was created precisely to avoid that nightmare, and with WSL2 Microsoft has finally hit the nail on the head: a near-native Linux, integrated into Windows and without having to set up a heavy virtual machine.
This is already the preferred option for thousands of developers because it allows you to open an Ubuntu, Debian, or Kali terminal within Windows 10 or 11, run commands, Docker, databases, or command-line tools as if you were on a Linux server, but without giving up your Windows applications and games. Let's see how it works, how to install it, how it differs from WSL1, and how to get the most out of it in your daily work.
What is WSL and why does it change a Windows developer's life?
WSL are the acronyms of Windows Subsystem for LinuxThe subsystem that allows you to run GNU/Linux distributions within Windows without needing a traditional virtual machine or dual booting. You can install Ubuntu, Debian, Kali, openSUSE, Arch (using appx), or other distributions and use their console tools directly from your Windows desktop.
Unlike WSL1, WSL2 It uses a real Linux kernel It runs in a lightweight virtual machine managed by Windows (Hyper-V and the virtual machine platform), with full support for ELF64 system calls. WSL1 was a system translation layer, fast for certain tasks but with serious limitations in compatibility, especially with tools like Docker.
For web developers, backend developers, DevOps or data specialists, this means you can working in an environment almost identical to the production environment (which in most cases is Linux), using the same libraries, database managers, queues, messaging servers, etc., without abandoning Windows. The classic "it works on my machine" is a thing of the past because you develop on Windows and deploy on a completely different Linux distribution.
WSL2 is not a full-fledged Linux graphical desktop Similar to a GNOME or KDE VM, the primary interface is the terminal. However, nowadays you can also run Linux GUI applications on top of WSL2, and even take advantage of GPU acceleration for workloads like machine learning or advanced graphics. If you need to access applications remotely, you can configure Chrome Remote Desktop on Windows.
Windows vs Linux: the classic development environment problem
Windows remains the most installed operating system on desktop computersWhile most production application deployments are done on Linux, this duality has always created a clash for developers who work in Windows but maintain or deploy applications on Linux servers.
macOS users have traditionally experienced less friction Because macOS shares a Unix-like foundation, and many tools behave similarly to Linux. That was one of the reasons so many developers migrated to Mac years ago: they were looking for a decent terminal and environments closer to production.
The big turning point came with DockerContainers became essential for development and deployment, but on Windows, performance and user experience were quite poor, with inefficient compatibility layers. WSL2 solves many of these problems, offering an environment where Docker works much better.
WSL1 vs WSL2: differences and why you should use version 2
WSL exists in two main versions: WSL1 and WSL2Although both allow you to run Linux on Windows, the architecture has changed a lot from one to the other, and that is noticeable in performance and compatibility.
- WSL1 translates Linux system calls to the Windows kernel. This results in very fast boot times and good file integration, but it has limited compatibility with some applications, especially those that need a real Linux kernel, such as certain database engines or Docker running at full capacity.
- WSL2 uses a lightweight virtual machine with a full Linux kernel.Managed by Windows. It offers full compatibility with system calls, improved file system performance (especially on the Linux file system itself), and enables advanced features such as native Docker on WSL2 and direct kernel access.
- Both versions share some featuresIts advantages include integration with Windows, fast boot times, compatibility with virtualization tools like VMWare or VirtualBox (in recent versions), and support for multiple distributions. However, only WSL2 features a full Linux kernel and complete system call support.
All of the above, The recommended option today is to use WSL2Unless you have a very specific reason to stay with WSL1. Docker Desktop, for example, is designed to integrate with WSL2, and many modern guides and tools already assume this version as the standard.

Requirements for installing WSL2 on Windows 10 and Windows 11
To use WSL2 you need a relatively recent version of Windows. In general, you must meet these conditions:
- Windows 10 version 2004 or later (build 19041+) to use the simplified command
wsl --install. - For WSL2 specifically, Windows 10 version 1903, build 18362 or higheror Windows 11.
- 64-bit architectureWSL2 is not available on 32-bit Windows 10.
Besides, You must ensure that virtualization is enabled in the BIOS of your team. If it isn't, you may encounter errors such as 0x80370102These messages usually indicate that hardware virtualization is not active. Enter the BIOS/UEFI, look for the options related to the CPU or "Virtualization Technology," and enable it.
Install WSL2 from scratch using the command wsl –install
In modern versions of Windows 10 and Windows 11, installation has been greatly simplified: it only requires one command and a restart.
1. Open PowerShell as administratorSearch for “PowerShell” in the Start menu, right-click, and select “Run as administrator.” Accept the User Account Control (UAC) prompt if it appears.
2. Run the complete installation command:
Command: wsl --install
This command handles several internal steps without you having to touch anything else:
- Activate the necessary optional components: Windows subsystem for Linux y Virtual machine platform.
- Download and install the latest Linux kernel for WSL.
- Configure WSL2 as the default version.
- Download and install a default Linux distribution (usually Ubuntu).
3. Restart your computer when Windows prompts you to do so.This is essential for the newly enabled features to become operational.
4. On the first boot of the Linux distribution (Ubuntu, unless you specify otherwise), a console window will open where the files are extracted. The first time takes a little longer; subsequent starts are usually almost instantaneous.
Choosing and changing the Linux distribution in WSL
- By default, the command
wsl --installusually installs Ubuntu as the default distribution. However, you can choose a different distribution both during and after installation. - To see the list of distributions available onlineOpen PowerShell and type:
- List:
wsl.exe --list --online - To install a specific distribution from the console, use the option
-dindicating your name: - Install distro:
wsl.exe --install -d NombreDeLaDistro - If you want to change the default distro (the one that opens when you simply run
wsl), you can do: - Default:
wsl.exe --set-default NombreDeLaDistro - And if you just want to launch a specific distribution on a one-off basis Without changing the default, use:
- Launch on time:
wsl.exe --distribution NombreDeLaDistro
In addition to Microsoft Store distributions, It is possible to import custom distributions from a TAR file or install packages .appx in some casessuch as Arch Linux. You can even create your own custom WSL images to standardize environments within a company.
Configure your Linux username and password in WSL
The first time you open your Linux distribution installed with WSLYou will be prompted to create a UNIX username and password. This account will be the default user for that distribution.
Keep in mind several important details about this user:
- It is not linked to your Windows user account.; you can (and it is recommended) make the name different.
- When you type the password, nothing will be displayed on the screen. (No asterisks). This is known as "blind" input, which is perfectly normal in Linux.
- This user is considered an administrator on that distro and can use
sudoto execute commands with elevated privileges. - Each distribution has its own set of users and passwords; if you add a new distro you will have to repeat the account creation process.
If you like change password Next, open the distribution and run: Change password: passwd
If you have forgotten a user's password for the distro But if you still have administrator access in Windows, you can regain control like this:
- Open a Command Prompt or PowerShell as administrator and log in as root on the default distro:
wsl -u root
For a specific distro:
wsl -d NombreDistro -u root - Inside that root terminal, run:
passwd nombre_usuarioand set the new password. - Log out of WSL with
exitand log back in normally with the recovered user account.
Ways to boot and use your Linux distributions on Windows
Once you have several distros installedYou can open them in different ways, depending on what is most convenient for you at any given time.
- Windows Terminal (recommended). Windows Terminal is Microsoft's modern terminal emulator. Each time you install a new Linux distribution in WSL, a new profile appears in Windows Terminal, which you can customize (icon, color scheme, startup command, etc.). It's the most convenient way to work with multiple command lines simultaneously.
- From the Start menu. You can type the name of the distribution (“Ubuntu”, “Debian”, “Kali Linux”…). Clicking it will open it directly in its own console window.
- From PowerShell or CMD. You can directly type the name of the distro (for example,
ubuntu) or use the generic command:
wslto enter the default distro, or
wsl -d NombreDistroto enter a specific one. - Execute a specific Linux command from Windows. Use the syntax:
wsl
For example:wsl ls -la,wsl pwd,wsl dateetc. This way you mix Windows and Linux commands in the same pipeline.
Windows Terminal: the perfect companion for WSL2
To get the most out of WSL2, it's worth installing Windows Terminal from the Microsoft Store. It's much more convenient and powerful than the classic Command Prompt or even the default PowerShell window.
Windows Terminal allows create profiles for each distroDefine which terminal opens by default (PowerShell, CMD, Ubuntu, etc.), use tabs, split panels, different color themes, custom fonts, background images, and advanced keyboard shortcuts.
For many developers on WindowsWindows Terminal + WSL2 is the combination that comes closest to the working experience of a native Linux system or a macOS with an advanced terminal, without leaving your usual Windows environment.
Setting up your development environment: VS Code, Visual Studio, Git, and databases
Once WSL2 is up and running, the next logical step is integrate your favorite editor or IDE with that environment. Microsoft has put a lot of effort into making Visual Studio Code and Visual Studio work perfectly with WSL.
VS Code
Ideally, you should install the Remote Development PackThis extension allows you to open a folder located in WSL as if it were a local project, but running the VS Code server within the distro. Just type:
code .
From the WSL terminal, in your project folder, VS Code will open that "remote" path with its entire ecosystem: extensions, debugging, integrated terminal, etc., but actually operating against Linux.
Visual Studio
It allows you to configure WSL as the target for C++ projects using CMake. You can compile and debug on Windows, WSL, or remote machines, switching the target from within the IDE itself.
Regarding version control, using Git within WSL is as simple as installing it with your distro's package manager (for example, sudo apt install git (on Ubuntu) and configure credentials, exclusion files, line endings, etc. You can also use the Windows Credential Manager to integrate authentication.
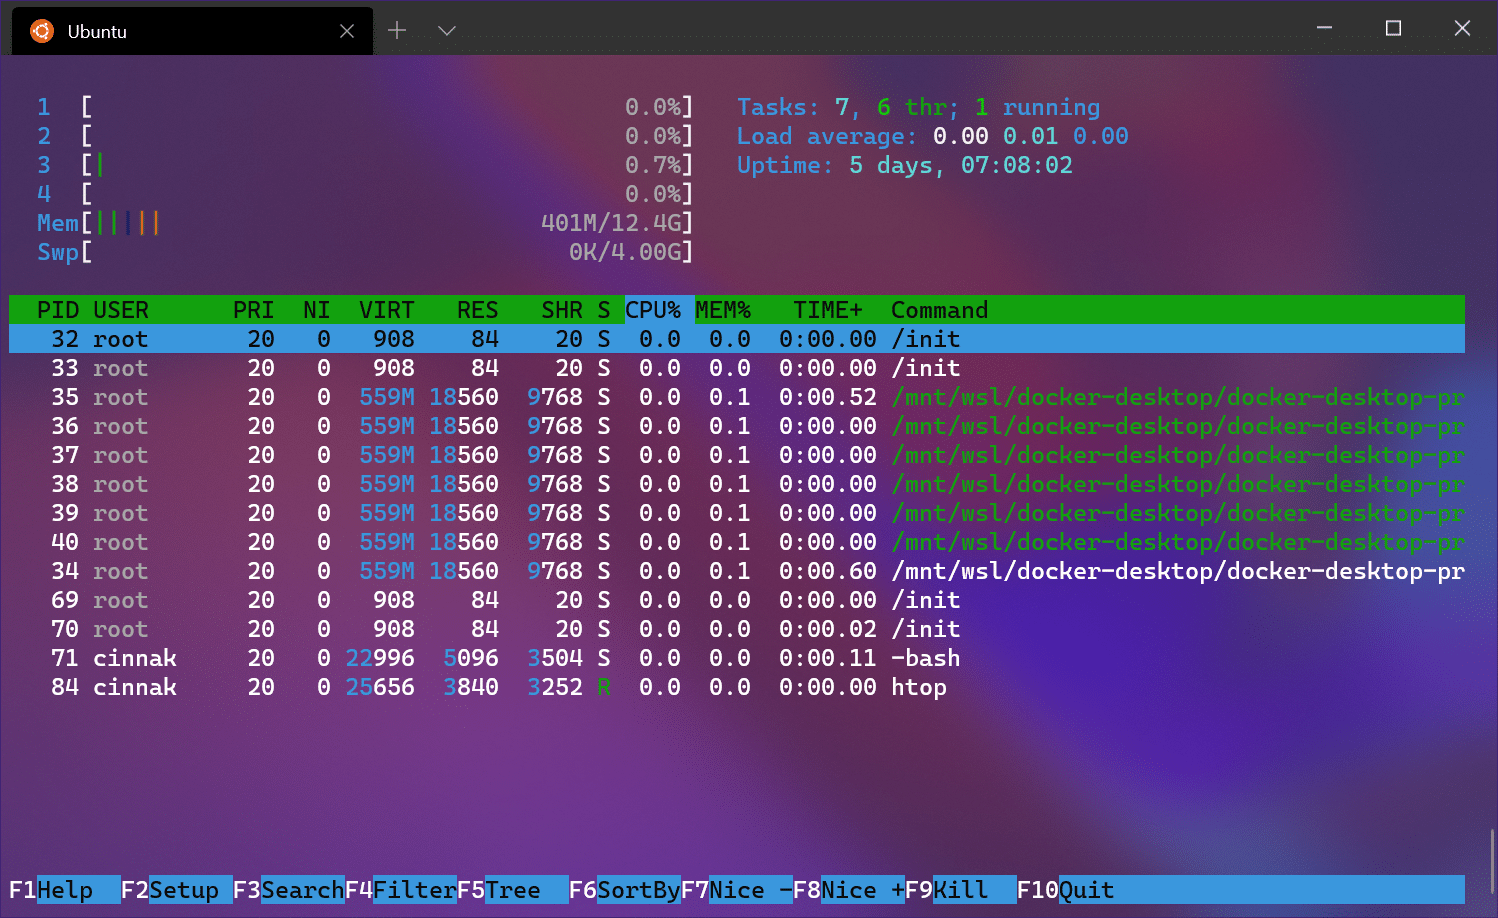
Configuring databases in WSL (MySQL, PostgreSQL, MongoDB, Redis, SQL Server, SQLite, etc.) is very similar to doing it on any Linux server. You can start the services within the distro or use Docker containers on WSL2, and then connect your applications from Windows or from WSL itself, depending on your needs.
Managing external drives, GUI, and backups of Linux distributions
WSL2 also allows mount external disks or USB drives directly in the Linux environment. Specific documentation exists for mounting disks with the command wsl --mountThis gives you a lot of flexibility when working with data you have in other units.
If you like run Linux graphical applications (GUI) within WSL2 is now possible thanks to Microsoft's support for GUI applications. This allows you to open graphical editors, design tools, or lightweight desktop environments without needing to boot a traditional virtual machine.
To do backups or moving a complete distro to another computerWSL includes two very useful commands:
- Export a distro:
wsl --export NombreDistro backup-wsl.tar
This generates a TAR file with its entire file system. - Import a distro:
wsl --import NombreDistro C:\ruta\destino backup-wsl.tar --version 2
This restores that distro with all its contents to another path and, if you want, ensures that it uses WSL2.
This export/import mechanism is very convenient for cloning development environments, sharing them with colleagues, or simply maintaining a security backup before making major changes.
WSL2 has established itself as the primary development environment For many Windows users who don't want to give up gaming, using specific software, or their workflow on this system, but need a true Linux environment for programming, giving WSL2 a try could be a game-changer for how you work.

Editor specialized in technology and internet issues with more than ten years of experience in different digital media. I have worked as an editor and content creator for e-commerce, communication, online marketing and advertising companies. I have also written on economics, finance and other sectors websites. My work is also my passion. Now, through my articles in Tecnobits, I try to explore all the news and new opportunities that the world of technology offers us every day to improve our lives.