- NVMe offers low latency and high command queuing when connected via PCIe.
- Preparing UEFI, M.2 x4 slot and copies is key to a safe migration.
- EaseUS, UBackit and AOMEI cover fast and sector-by-sector cloning.
Switching to an NVMe drive is one of those improvements that you'll notice from the first boot: More speed, less latency, and a system that responds instantlyIf you already have your PC working, it makes sense to migrate it as is without reinstalling Windows or your applications. The good news is that You can clone your drive to NVMe and boot as if nothing happened..And without having to reinstall the system.
In this guide, we've gathered everything you need to achieve this safely: What is NVMe and why does it matter?, requirements and preparations, recommended tools, and precise steps for cloning. We also provide tips to avoid any issues and how to configure the new disk's boot process in the BIOS/UEFI.
NVMe in a nutshell: Why it's so fast and how it connects
NVMe (NVM Express) is a specification created specifically for SSDs using PCI Express, with a clear objective: Take advantage of parallelization and bandwidth from the PCIe busUnlike traditional SSDs, NVMe supports queues of up to 64.000 commands, and the protocol itself works with just XNUMX well-optimized commands for efficiency.
While in older units it is processed one operation after anotherNVMe allows for a large number of parallel operations, reducing bottlenecks and latency. The results are noticeable when opening programs, moving large files, or loading games: everything goes considerably faster.
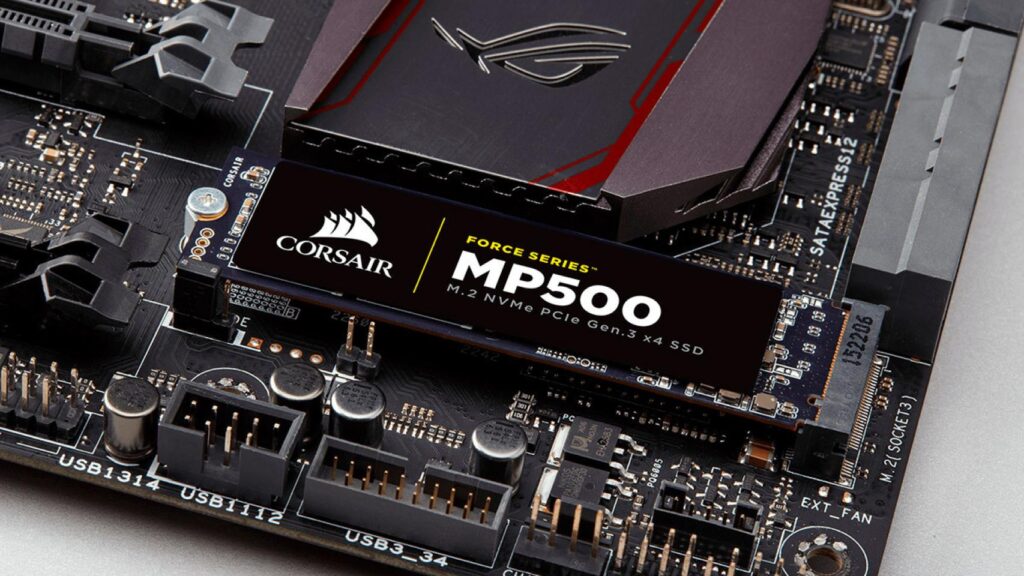
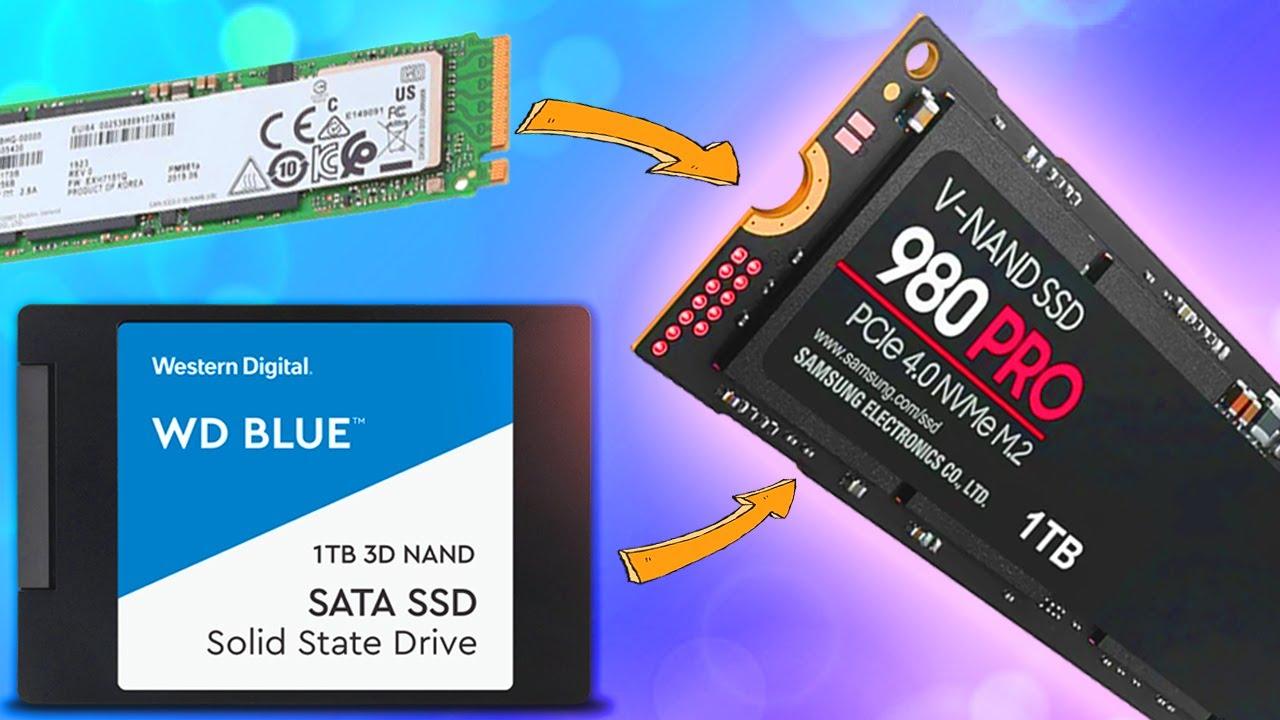
As for formats, you'll see NVMe in M.2 (the most common in modern laptops and desktops), PCIe cards, and in U.2. U.2 is a form factor that exclusively uses the NVMe protocol, designed for chassis and environments that require hot-swap drives or cables instead of the M.2 module.
The NVMe connection is made directly over PCIe, which is why its performance is so high compared to SATA. In short, Connectivity, speed and efficiency are the natural terrain of NVMe, and that's why it's the ideal choice for your system drive.
Can I clone an NVMe to another NVMe (or from SATA to NVMe)?
The short answer is yes: You can clone an NVMe SSD to another NVMe SSD, and also migrate from a SATA HDD/SSD to an NVMe SSD.Many people do this to gain storage capacity without losing their Windows installation or programs, or to speed up a computer that still uses a mechanical hard drive.
Windows does not include a built-in disk cloning feature, so you will need third-party software. The advantage is that these tools have polished the process a lot: you don't need to reinstall the system and, if you do things right, Your data remains safe throughout the migration.
In essence, cloning is copying at the disk or partition level all the contents of the source to the destination, so that the computer boots from the new drive as if it had always been there. This process works the same whether you're moving from HDD to NVMe, SATA to NVMe, or NVMe to NVMe.
Requirements and preparations before cloning
Before you start cloning your drive to NVMe, to ensure a clean boot without any surprises, it's a good idea to review a few basics. The better you prepare the ground, the less risk of errors during cloning.
- Relatively recent hardware: Intel Skylake chipsets or later (or AMD equivalent) are preferred. While older systems are compatible, modern ones make it easier.
- M.2 PCIe x4 slot: Essential for installing NVMe. If your motherboard only has one slot and you want to hot clone, consider an M.2 to PCIe adapter to connect the second drive.
- UEFI Firmware and UEFI Boot ModeModern Windows installations work this way by default. Make sure the BIOS is configured correctly.
If your system is already running on NVMe, you can skip some of these checks, but you'll notice two important nuances: if you only have one M.2 slot For NVMe you will have to opt for an M.2 to PCIe adapter or, failing that, use a backup and restore workflow.
Recommended cloning tools and what each one offers
There are many valid applications, but there are three that stand out for its balance between ease, features and success rate: EaseUS Disk Copy, Wondershare UBackit and AOMEI Partition Assistant Professional.
EaseUS Disk Copy
EaseUS Disk Copy stands out for a clear and very direct interface. Although Windows doesn't have a native cloner, with this tool you can replicate your disk without reinstalling anything. The flow is simple: choose the cloning mode (e.g., Disk mode), you select the source disk, the destination disk, and choose how you want to distribute the partitions on the new NVMe.
A couple of important details: if you decide to clone sector by sector, the destination disk must be at least the same size as the source disk (or larger). Also, before you begin, activate the license to ensure a smooth process without any mid-course limitations.
In the disk layout section, EaseUS allows three useful options: automatic disk adjustment (recommended so that everything fits proportionally), copy as source (same distribution), or edit layout (resize/move manually). And if the destination is an SSD, remember to check the box “Check if the destination is SSD” to optimize alignment and performance.
Wondershare UBackit
Wondershare UBackit offers backup and clone functions with a clean and friendly interface. It's a very convenient option for cloning from SATA to NVMe (or between different types of drives) without having to deal with advanced settings.
- Full disk cloning: Copy an HDD to an SSD, or to another HDD/SSD, without the headache.
- Partition cloning: If you only need to move a specific partition, you can do that too.
- Sector-by-sector cloning: bit by bit replica when you want an exact copy, useful in more demanding scenarios.
- Wide compatibility: Windows 11/10/8.1/8/7 (32-bit & 64-bit) and supports HDD, SATA/M.2 SSD, NVMe SSD, USB drives, NAS and SD cards.
As an incentive, it has 30-day free trial, perfect if cloning is a one-time thing and you don't want to purchase a permanent license. In practice, you'll select the source (SATA) and destination (NVMe) drives, the cloning type, and that's it.
AOMEI Partition Assistant Professional
AOMEI Partition Assistant Professional is more than just a partition manager; it includes a robust disk cloner which works very well between NVMe drives (and with other combinations). It is compatible with different brands (Samsung, Intel, WD and more) and allows migrate only the system when you don't want to copy secondary data.
Its cloning wizard lets you choose between “Clone the disk quickly” (copies only the used space, ideal for moving to a smaller NVMe whenever it fits) or “Clone sector by sector” (copies all sectors, even unused ones). When preparing the destination, it is often a good idea initialize the new NVMe as GPT to maintain UEFI compatibility.
A useful detail in your flow is the option “Optimize performance for SSDs”, designed to apply SSD alignment and adjustments. If you're running Windows Server, there's a specific edition: AOMEI Partition Assistant Server for professional environments.
Step-by-step guides to clone your drive to NVMe
Let's get to the important stuff: How to perform cloning with each tool. Choose the one that best suits your scenario and comfort level.
Clone NVMe to NVMe with EaseUS Disk Copy
- Download, install and activate EaseUS Disk Copy. This prevents limitations and ensures the process is uninterrupted.
- Connect the new NVMe. If your board only has one M.2, use a M.2 to PCIe adapter to have both at the same time, or consider the backup and restore option.
- Open EaseUS and choose Disk modeSelect the source disc (your current unit) and press next.
- Select the destination disk (the new NVMe). If you want an exact sector-level replica, remember: the destination must be equal to or greater than that the origin.
- On the partition layout screen, choose between automatic adjustment (recommended), copy as source o edit manually sizes and position.
- Check the box “Check if the destination is SSD” to optimize NVMe alignment and performance.
- Click on ProceedThe computer may restart to complete the cloning outside of Windows; do not interrupt it.
When finished, turn off the PC and remove the old disk or adjust the boot order so the system boots from the cloned NVMe drive. If all went well, you'll see your Windows and programs just like they were, but with a performance boost.
Clone SATA (HDD/SSD) to NVMe with Wondershare UBackit
- Prepare the environment: Back up essentials, update Windows and drivers, and free up space if you're right on the destination drive.
- Install and open Wondershare UBackit. Its interface is very clear, ideal if it's your first cloning.
- Go to the function of Disk clone. Choose as origin of the SATA (HDD/SSD) and as destination the NVMe. Confirm that the destination is empty or that you are happy for it to be overwritten.
- Select the method: normal (fast) cloning or sector by sector If you need a bit-by-bit copy. Remember that sector cloning requires destination of the same size or larger.
- Start cloning and wait. UBackit handles the process, and once it's finished, your system will be ready to configure. boot from NVMe.
If occasional use is enough for you, the 30-day trial can cover the entire operation, and the flow is simple enough that you won't get lost in advanced options.
Clone with AOMEI Partition Assistant (includes cloning from Windows)
- Install AOMEI Partition Assistant Professional. If you only have one M.2 slot, connect the new NVMe via M.2 to PCIe adapter. Initialize the NVMe as GPT if it isn't.
- From the app, go to Clone > Clone disk. AOMEI will offer you two modes: “Clone the disk quickly” (copy the space used) or “Clone sector by sector” (exact replica of all sectors).
- Select the source disc (your current drive, often “Disk 0” with the C: partition) and then the destination disk (the new NVMe).
- Activate the option “Optimize performance for SSDs” when appropriate. With this, AOMEI aligns partitions and improves the lifespan of the SSD.
- Decide if you want adjust partitions automatically, copy as is, or resize manually. This is useful if the destination NVMe drive is larger and you want to use all the space.
- Click on Apply. The normal thing is that the team is reboot and run the clone outside of Windows, so you shouldn't touch anything until it's finished.
An interesting point is that AOMEI allows migrate only the system if you don't want to move your personal data. And if you work with Windows Server, there is a specific version of the program for that environment.
Practical tips and common mistakes to avoid
To finish, here are some recommendations that help you have a headache-free cloning and a reliable start on the first try.
- UEFI and GPTIf you're booting in UEFI mode, prepare the NVMe drive as GPT. Avoid mixing MBR/GPT between the source and destination when your firmware is in pure UEFI.
- Right-sized destination: In sector-by-sector cloning, the NVMe must be equal to or larger. In quick cloning, check that the used space of the origin fits at the destination.
- Alignment for SSD: Enable the “check if SSD” or “optimize for SSD” options to ensure a correct 4K alignment and preserve performance.
- A single M.2 in laptops: Consider an M.2 to PCIe/USB adapter to connect the second drive, or use a dedicated M.XNUMX image and restoration if you cannot mount both drives at the same time.
- Startup test: Before erasing or reusing the old disk, disconnect it and verify that the system boots 100% from NVMe. This way you avoid surprises.
- Post-maintenance: make sure that TRIM is enabled, update the NVMe SSD firmware if applicable and check that Windows correctly detects the drive.
- Driver Compatibility: Very old equipment may need BIOS settings (boot mode, CSM) to recognize the NVMe as bootable.
Switching to NVMe without reinstalling is entirely feasible if you take care of the details: check requirements, choose the appropriate tool, use quick or sector cloning as appropriate, and configure the boot in the BIOS.
Editor specialized in technology and internet issues with more than ten years of experience in different digital media. I have worked as an editor and content creator for e-commerce, communication, online marketing and advertising companies. I have also written on economics, finance and other sectors websites. My work is also my passion. Now, through my articles in Tecnobits, I try to explore all the news and new opportunities that the world of technology offers us every day to improve our lives.