- Checking M.2 slot compatibility and BIOS/UEFI settings is key for the motherboard to detect the NVMe SSD.
- If the BIOS sees the SSD but Windows does not, it is usually due to missing initialization, partitions, or appropriate storage drivers.
- The Windows installer may require specific drivers (RST/VMD or others) to show NVMe as the installation destination.
- If the SSD is still not recognized after testing it on other computers, it is probably defective and you should seek a warranty claim or replacement.
¿What to do when Windows doesn't recognize a new NVMe SSD? When you get a new NVMe SSD to speed up your PC and Windows does not recognize the new drive.The frustration is overwhelming: you've spent money, you've carefully assembled everything… and the system doesn't even recognize the hard drive. Don't worry, it's a very common problem and, unless the hardware is defective, it almost always has a solution.
Throughout this guide we will review in great detail All the common reasons why Windows fails to detect a new NVMe SSD (both on desktop and laptop computers) and the different ways to fix it: from checking the compatibility of the motherboard and BIOS, to tweaking options such as AHCI, RAID, VMD, going through Disk Management, controllers and some less obvious tricks.
What exactly is an NVMe SSD and how does it differ?
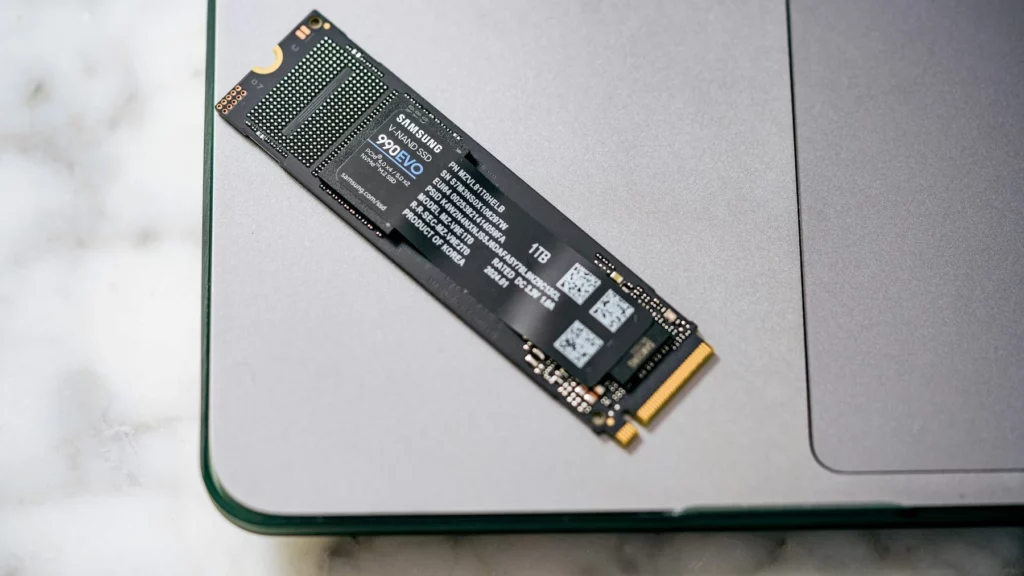
Before we get down to business, it's important to understand what you're installing. An NVMe SSD is based on the protocol Non-Volatile Memory Express, designed specifically for high-speed flash memory and to communicate directly with the CPU via PCIe lanesThis allows you to manage thousands of parallel command queues and greatly reduce latency compared to a traditional hard drive or even a SATA SSD.
In practice, this means that a modern NVMe SSD can offer speeds of several GB/snear-instantaneous access times and significantly superior performance in demanding tasks (gaming, video editing, virtual machines, etc.). That's why it has become the standard in current-end desktops, laptops and serversAnd that's why it hurts so much when the operating system isn't even able to see it.
In addition, many NVMe SSDs use the physical format M.2But be aware: just because a motherboard has an M.2 slot doesn't mean it's compatible with any SSD. Some M.2 slots only support SATA drives, others only NVMe via PCIe, and others are mixed, so interface and slot compatibility It's one of the first things to check if your new NVMe drive doesn't show up.
Why Windows (or the BIOS) doesn't recognize a new NVMe SSD
When a newly installed NVMe SSD doesn't show up in the system, the problem usually falls into one of these categories: It's not shown in the BIOS.It's visible in the BIOS but It does not appear in Windows.or it's seen in third-party tools but The Windows installer does not detect itFrom there, the typical causes are quite repetitive.
Among the most frequent reasons we find the following: limited compatibility of the M.2 slotThe SSD may be poorly connected or loose, or BIOS options may leave it disabled. Outdated or non-existent storage drivers, conflicts with AHCI/RAID/VMD modes, absence of drive letter or volume in Windows, and even cases where the drive comes defective from the factory.
Modern motherboards also utilize technologies like Intel VMD or Intel Rapid Storage, which can make an NVMe drive "hidden" during Windows installation until it is... load specific driversAnd on OEM laptops, it's relatively common that, without those drivers, the Windows installation wizard won't show any disk on which to install the system.
NVMe SSD not detected in BIOS: what to check step by step
If, when you turn on the computer, you enter the BIOS/UEFI and You don't see the NVMe SSD listed anywhereThe problem is at a very basic level: either the board is not compatible, or the unit is not making good contact, or some low-level configuration is rendering it inoperable.
1. Check motherboard – NVMe SSD compatibility
Although it sounds obvious, it is vital to ensure that the M.2 slot on your motherboard It supports the type of SSD you purchased. Some motherboards have M.2 slots with only SATA, others with only PCIe NVMe, and others with both. If you install an NVMe PCIe SSD in an M.2 slot that only recognizes SATA, He will never admit it..
The first thing to do is check the motherboard manual or the manufacturer's website and look for the M.2 slot specifications section. There you'll see if they support PCIe x2, x4, NVMe, SATA, or a combination. It's also a good idea to check if any sockets are Disabled when using certain SATA ports or other M.2 slots, which is very common on mid-range motherboards when PCIe lanes are shared with the chipset.
If you've already confirmed that the SSD model (for example, a PCIe 3.0 x4 NVMe) is compatible with the slot where you've installed it, check if There is a BIOS update for your motherboard. Newer versions often expand compatibility with recent SSD models or fix bugs that prevented them from being detected correctly.
2. Check the physical installation of the NVMe SSD
An extremely common problem is that the SSD is not properly inserted into the M.2 socket Or the screw that securely holds it in place might be missing. If the unit is lifted or loose, it may appear connected at first glance, but the contacts aren't making proper contact and the circuit board won't detect it.
The best thing to do is turn off the PC. turn off the power (and the battery in laptops, if removable), open the case and locate the M.2 slot, which is usually near the processor socket or PCIe ports, labeled M.2, SATA, or PCIe. Remove the screw, insert the SSD into the slot at the correct angle, push it all the way in, and screw it back in. remain completely firm and parallel to the plate.
If the motherboard or laptop isn't new, it's a good idea to gently clean the gold contacts of the SSD and the M.2 connector area, as dust, grease or dirt They can prevent good contact. Take this opportunity to check that you haven't placed it in an M.2 slot intended for a Wi-Fi or Bluetooth card, something that also happens in some teams.
3. Enable PCIe/M.2 support in the BIOS
On certain motherboards, especially those in the enthusiast or workstation range, the M.2 port or the dedicated PCIe lanes for SSD They are disabled by default or linked to RAID options. In those cases, even if the hardware is correct, the BIOS hides it.
Access the BIOS by pressing the corresponding key when starting up (I usually see Delete, F2, F10, or Esc (according to the manufacturer) and enter the advanced storage sections, SATA, PCIe, or NVMe. Look for options like “PCIe Storage Support”, “M.2_2 Storage RAID Support”, “NVMe Configuration”, “Onboard Device Configuration” or similar, and make sure the corresponding slot is enabled.
On Gigabyte motherboards, for example, it is common to have to activate an option like “M.2_2 PCIe Storage RAID Support"This allows certain M.2 slots to function correctly. Once you've adjusted the option, save the changes, restart, and re-enter the BIOS to check if the SSD now appears in the device list."
4. Reset or update the BIOS
If you're sure your motherboard is compatible with the drive and it's properly connected, but it still doesn't show up, it's possible that something BIOS preconfiguration is interfering. In that case, a full BIOS reset might solve the problem.
Go into UEFI and look for an option like “Load Optimized Defaults“Load Setup Defaults” or similar, apply it, save, and restart. This will clear any unusual settings that might be blocking the M.2 drive. If nothing changes, please evaluate the process. update the BIOS to the latest versionusing the method recommended by the manufacturer (Q-Flash, EZ Flash, etc.).
In some very specific cases, advanced parameters such as chipset or PCIe controller voltagesThis is especially true for motherboards that have undergone aggressive overclocking or undervolting. Adjusting these settings requires expertise, so if you suspect this is the case, it's best to revert to default values and test again.
5. Try other M.2 sockets or even another motherboard
Some motherboards disable an M.2 slot when certain SATA drives are connected, and there is also the possibility that that specific baseboard is damagedIf your motherboard has multiple M.2 slots, move the SSD to another slot and check if it is detected there.
If you have access to another compatible PC or laptop, try the SSD in that other machine. If the other PC recognizes it without issue, then your computer is the suspect. original motherboardIf it doesn't work on any other machine either, the unit is probably faulty and the reasonable thing to do is... process warranty or return.
The NVMe SSD is visible in the BIOS but does not appear in Windows.
Another very common scenario: you enter the BIOS and see the SSD listed without problems, but when you boot Windows It does not appear in This PCOr you don't even see it in Disk Management. In this case, the hardware and basic detection are working, and the conflict lies in the part of disk management, partitions, or controllers within Windows.
1. Initialize the SSD and create a volume
A new SSD usually comes unpartitioned and unformatted, so Windows won't recognize it as a drive until you format it. initialize and create a volumeThis is done from within Windows Disk Management itself, without the need for additional programs.
Right-click the Start button and enter Disk ManagementIf the system detects the SSD but it's raw, you'll see a space at the bottom marked as “Not assignedor an uninitialized disk. Right-click on the left area (where it says Disk 1, Disk 2, etc.) and choose "Initialize disk", selecting from MBR or GPT depending on the type of system and boot you are going to use.
Once initialized, in the “Unassigned” area, right-click and select “New single volume...Follow the wizard (it's basically Next, Next, Finish), leave all the space on a single volume, and choose a file system (usually NTFS) and a free drive letterOnce the quick format is complete, the drive should appear in This PC, ready to use.
2. Change or assign drive letter
Sometimes the volume exists, but It has no assigned letteror it conflicts with another one. This prevents it from showing up in Explorer, even though it is visible in Disk Management.
In the same utility, locate the SSD partition, right-click on it and choose “Change drive letter and pathsIf you don't have one, click "Add" and select an available drive letter; if you already have one but suspect a conflict, click "Change" and choose a different one. After applying the change, the drive should start displaying without further issues.
3. Update or reinstall storage drivers
If the SSD appears in the BIOS but Windows doesn't list it as a disk in Disk Management, there's likely a problem with... storage controllers (NVMe controller, SATA, RAID, VMD, etc.).
Right-click on Start and open the Device ManagerExpand the “Disk drives” and “IDE ATA/ATAPI controllers” or “Storage controllers” sections. If you see the SSD listed, right-click on it and choose “Update driver"Letting Windows automatically search for updated software. If that doesn't fix it, you can uninstall the device from there and restart, so Windows detects and reinstalls it." from scratch the driver.
In some devices (especially laptops and motherboards with Intel Rapid Storage or Intel VMDIt is crucial to download the latest storage-specific drivers from the manufacturer's website. Many users have resolved the issue. Installing the RST/VMD drivers And from then on, the operating system has recognized NVMe without any issues.
4. Run the Hardware and Devices troubleshooter
Although it's not a miracle solution, the hardware troubleshooter Windows can detect basic conflicts with storage devices and correct them automatically.
Look in the taskbar “Hardware and devices(In some versions, you need to run the troubleshooter from the command line or from Settings > Update & Security > Troubleshoot) and launch it. Let the scan finish and apply any suggested fixes, in case there's a simple issue preventing the SSD from appearing.
5. Use advanced disk management tools
If you still don't see the SSD as a usable drive, but the system does detect it as a device, you can resort to advanced partitioning programs such as AOMEI Partition Assistant or other similar alternatives. These tools allow initialize disks, format partitions, change drive lettersConvert between MBR and GPT without losing data, and many additional features.
With a complete partition manager you'll have more control over actions like format a system SSDThis allows you to correct partition errors or create volumes that standard Disk Management struggles with. However, before touching anything on a disk containing important data, it's highly recommended to make a backup.
The Windows installer does not recognize the NVMe SSD
Another typical scenario: your BIOS sees the SSD, some third-party tool also detects it, but when you boot from a Windows installation USBWhen I get to the hard drive selection screen, no drive appears available, as if it didn't exist.
This case is usually linked to storage drivers that the installer does not include by default (very common in some HP, Dell, etc. laptops), to problems with how the bootable USB was created or to the storage mode configuration (AHCI, RAID, VMD) in the BIOS.
1. Load Intel RST/VMD or other drivers into the installation
Many modern laptops with Intel processors and support for Intel Rapid Storage Technology (RST) or VMDThe NVMe SSD is "behind" that controller, so the generic Windows installer It doesn't see it until the appropriate driver is loaded..
The practical solution is to go to the manufacturer's support page (for example, the HP website for your specific laptop model) and download the Intel RST/VMD storage drivers corresponding to your version of Windows. Once you have downloaded the package, extract it to a folder on the installation USB drive.
During the Windows installation wizard, when you get to the screen where the disks should appear, click on “Load driverNavigate to the drivers folder you created on the USB drive and select the HSA/VMD drivers or equivalent. In many cases, as soon as the installer loads these drivers, the NVMe SSD appears instantly and you can now continue with the installation as normal.
2. Review how you created the installation USB drive
Not all methods for creating a bootable USB drive work equally well with all computers. Some models have problems if you use the Microsoft's official media creation tool, while they work perfectly if the same ISO is burned with Rufus, or vice versa.
If your laptop only recognizes the USB drive when you prepare it with RufusMake sure you've correctly selected the partition mode (GPT/UEFI or MBR/Legacy BIOS) depending on your computer's configuration. If the SSD doesn't appear during Windows installation, try recreating the USB drive by changing the partition scheme and target system in Rufus and try again.
It is also advisable to temporarily disable options such as Secure Boot or TPM in the BIOS if you suspect they are causing noise during the installation process, although they are not usually the cause of the NVMe drive not showing up.
3. Adjust AHCI, RAID, CSM and boot modes
On desktop motherboards with many storage options, setting the SATA/NVMe mode can cause the SSD to be associated with a RAID controller which requires additional drivers. Some users resolve the NVMe detection issue by changing the mode of RAID to AHCI before installing Windows, or by disabling “CSM support” to force a pure UEFI boot.
There's no single combination that works for everyone, as each manufacturer names and groups these options differently. The general idea is to try the mode AHCI standardCheck if the SSD appears in the installer, and if not, consider using RAID/VMD along with their corresponding controllers loaded during installation as discussed earlier.
Case studies and additional recommendations
In addition to the generic problems, there are very specific situations that you should keep on your radar, both for laptops and desktops, and some tips to avoid going crazy trying things randomly.
1. Laptops that only accept certain SSDs or modes
Some laptops, especially those from major brands (HP, Lenovo, etc.), are quite picky about the SSD models that you're mounting or how the internal firmware manages the NVMe storage. It's not uncommon for a drive to work perfectly as a secondary drive in a desktop PC and yet require specific drivers and BIOS settings so that the laptop sees it as a system disk.
It's always a good idea to check the support section for your specific model on the manufacturer's website and follow their instructions: Recommended BIOS, storage controllers Our own notes on SSD compatibility, etc. On some computers, as has happened to other users, the SSD only appears in the Windows installer. after loading the VMD/RST drivers of the brand.
2. Check the old SSD and accessories (spacers, enclosures)
If you're replacing one unit with another, it's worth making sure that the Old SSD still worksIf you still can't see the old one when you reassemble it, the problem might not be the new NVMe drive, but the M.2 slot itself or some physical damage from handling.
In laptops, it is common for the original drive to come with a small housing, bracket, or spacer so that it fits perfectly in the slot. If you didn't reuse those components when installing the new one, the SSD might not be properly seated or make good contact, so check if any intermediate pieces that came pre-installed are missing.
3. Test the SSD in another system or using an adapter
When you've been trying out settings on the same machine for a while, a quick way to clear up any doubts is test the SSD in another computerIf it's an M.2 NVMe SSD, you can use a different motherboard with a compatible slot, a PCIe-M.2 adapter, or even a USB‑C external enclosure for M.2 (Keep in mind that the speed will be limited by the USB port, but at least you'll know if the unit is responding).
If it's detected on another device without further investigation, the problem lies with yours. original motherboard or laptopIf it doesn't work anywhere either, the unit is usually faulty, and at that point the sensible thing to do is stop forcing it and go to the guarantee or refund as soon as possible.
4. Avoid buying second-hand SSDs without checking their condition.
When buying SSDs, especially high-end NVMe SSDs, it's tempting to resort to second-hand market to save a little money. The problem is that these drives have a limited number of write cycles, and You don't know how worn out it is. actually the SSD you're buying.
If you decide to go for a used one, at least request recent tests with tools like CrystalDiskInfowhere you can see the health status, terabytes written, and temperature. And, if possible, test the drive yourself as soon as you receive it. Ideally, though, buy new SSDs from stores that don't sell refurbished units without distinguishing between them, thus avoiding unpleasant surprises and unusual compatibility issues.
What to do when you suspect your NVMe SSD is damaged
If after checking compatibility, connections, BIOS, drivers, boot modes and cross-testing the SSD still without being recognized or behaves erratically (sometimes it appears, sometimes it disappears, it gives constant errors), most likely we are facing a hardware failure.
At that point it makes sense to use diagnostic tools that read the SMART of the disk and run surface tests, provided the system can at least minimally detect the drive. If the diagnostics can't even boot from the disk, or show serious block and controller errors, there's little you can do at home.
The best thing to do is check the manufacturer's warranty policy and request a replacement if it's within the timeframe. If you had important information without a backup, you might consider contacting a professional data recovery serviceHowever, the costs are usually high. In any case, excessive handling of a physically damaged unit can worsen its condition, so if you suspect physical failure, it's best not to force it.
Recovering data from an NVMe SSD that Windows doesn't recognize correctly
Sometimes the problem isn't that the SSD does not exist, but Windows doesn't mount it correctly.The partition table is corrupted, or you experienced an error while reconfiguring the drives. If the disk is visible but you can't access the files, or the files have disappeared, you can still try. retrieve the information before formatting.
There are data recovery programs specialized in hard drives and SSDs that allow you to scan the drive in depth, list deleted or lost files, and restore them to another secure location. Tools like EaseUS Data Recovery Wizard and similar programs are capable of working with logically damaged NVMe SSDsprovided that the operating system can see the disk at the physical level.
The usual workflow involves selecting the affected unit, initiating a full scan (which may take quite a while depending on the size of the SSD), review the files it finds and, finally, recover the ones you want to a different disc To avoid overwriting data, it's best not to use the damaged drive for anything else until the process is complete, to maximize the chances of success.
When nothing seems to work and you've been going around in circles for a while, the most sensible thing to do is follow a kind of mental checklist: Confirm M.2 and interface compatibility, check that the SSD is properly installed and secured, correctly enable the BIOS options (PCIe, M.2, AHCI/RAID/VMD), check if the drive appears in the BIOS, verify if Windows detects it in Disk Management or only in Device Manager, initialize and create a volume if it is new, update or load storage drivers in the system or in the Windows installer itself, try in another socket or on another computer, and if it still does not show any signs of life, assume that the drive or the motherboard may be defective and resort to the warranty or specialized technical support.
Passionate about technology since he was little. I love being up to date in the sector and, above all, communicating it. That is why I have been dedicated to communication on technology and video game websites for many years. You can find me writing about Android, Windows, MacOS, iOS, Nintendo or any other related topic that comes to mind.